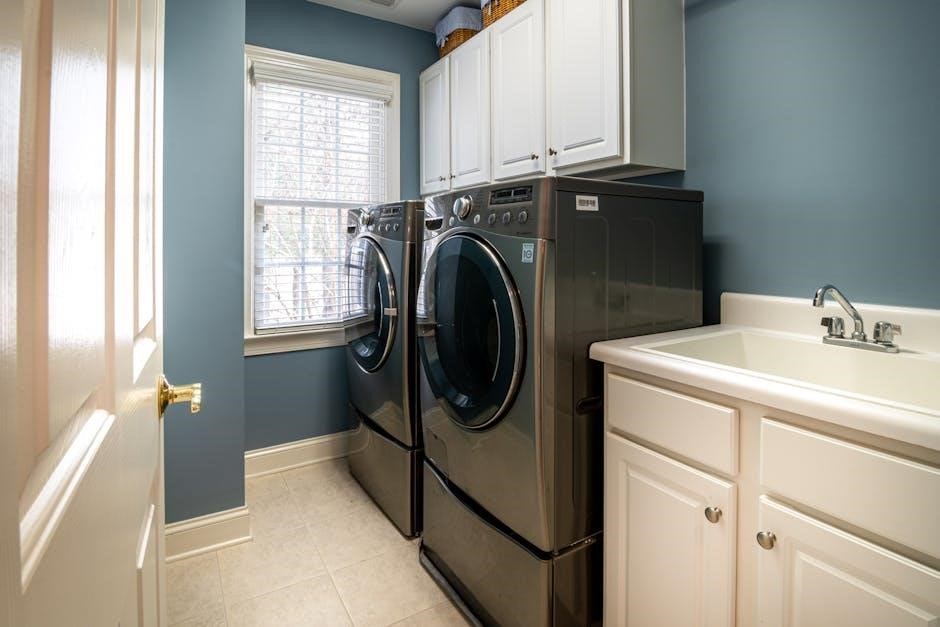
The GE Front Load Washer is designed for high-efficiency laundry with advanced features like steam cleaning and smart technology. It offers a spacious capacity for larger loads.
With energy-saving modes and customizable cycles, this washer ensures optimal cleaning while reducing utility costs. Its sleek design and user-friendly interface make it a modern addition to any home.
1.1 Overview of the Washer
The GE Front Load Washer is a high-efficiency appliance designed to deliver superior cleaning performance while minimizing energy and water usage. Its sleek, modern design integrates seamlessly into any home, offering a spacious interior for larger laundry loads. With advanced features like steam cleaning and smart technology, this washer ensures deep stain removal and fabric care. The washer’s intuitive control panel allows users to customize cycles and options, making it easy to tackle various fabric types and soil levels. Designed for durability and quiet operation, it features a robust construction and noise-reduction technology. Regular maintenance is simplified with features like the UltraFresh Vent System, which helps prevent odors and bacterial growth. This washer is an ideal choice for households seeking a reliable, efficient, and feature-rich laundry solution.
By combining innovative technology with user-friendly design, the GE Front Load Washer offers a convenient and effective laundry experience.
1.2 Key Features and Benefits

The GE Front Load Washer boasts an array of innovative features designed to enhance cleaning performance and user convenience. One of its standout features is the Steam Cleaning option, which penetrates deep into fabrics to remove tough stains and sanitize clothes. The UltraFresh Vent System ensures optimal drying and prevents odor-causing bacteria growth, keeping the washer fresh. Additionally, the SmartDispense Technology allows for precise detergent dosing, saving users money and reducing waste.
Other key benefits include Energy Star Certification, ensuring energy efficiency and lower utility bills, and a Large Capacity Drum, accommodating bulky items like comforters. The washer also features Multiple Wash Cycles and customizable options for different fabric types and soil levels. With its advanced noise-reduction technology, the washer operates quietly, making it ideal for home use. These features collectively make the GE Front Load Washer a versatile and efficient appliance for modern households.
1.3 Parts Diagram and Components
The GE Front Load Washer includes a detailed parts diagram in its user manual, highlighting key components for easy identification and maintenance. The main sections include the outer tub, which holds water, and the inner tub, where clothes are placed. The door assembly ensures a watertight seal, while the detergent dispenser distributes detergent evenly; The control panel houses buttons for cycle selection and customization.
Additional components like the drain pump and gasket are essential for proper drainage and preventing leaks. Users can refer to the diagram to locate parts such as the balance ring and shocks, which stabilize the washer during operation. Understanding these components helps in troubleshooting and maintaining the appliance effectively. The manual provides clear visuals and descriptions to guide users in identifying each part accurately.
Safety Precautions
Ensure children stay away from the washer and keep the lid closed securely. Avoid hot surfaces and sharp edges. Follow electrical guidelines and proper venting instructions for safe operation.
2.1 General Safety Warnings
Always ensure the washer is properly installed and leveled to prevent tipping. Never lean on the washer lid, as this may cause instability or damage. Keep children away from the washer during operation, as moving parts can pose a hazard. Avoid overloading the washer, as this may lead to imbalance and vibration during operation. Use only recommended detergents to prevent damage to the washer and potential harm to users. Never reach into the washer while it is in operation, as the spinning drum can cause injury. Ensure the washer is placed on a stable, heat-resistant surface to avoid damage from heat or moisture. Keep the area around the washer clear of flammable materials. Always unplug the washer before performing any maintenance or repairs to ensure safety. Follow all instructions in the user manual to avoid accidents and ensure proper functionality.
2.2 Electrical Safety Guidelines
Ensure the washer is installed by a qualified electrician to meet local electrical codes. Use a dedicated 120-volt, 60Hz electrical outlet to power the washer. Never use an extension cord, as it may cause electrical hazards. Keep the power cord away from water and heat sources to prevent damage. Avoid overloading circuits, as this can lead to electrical fires. Always unplug the washer before performing maintenance or repairs. If the washer experiences an electrical malfunction, such as a short circuit, immediately disconnect it from the power source. Do not operate the washer if the power cord is damaged. Ensure the outlet is properly grounded to prevent shock. Follow all electrical safety guidelines provided in the user manual to ensure safe operation and avoid potential hazards.
2.3 Proper Venting Instructions
Proper venting is crucial for efficient operation and to prevent moisture buildup. Ensure the washer is vented to the outdoors using a rigid venting system. Flexible ducting should be avoided as it can collapse or restrict airflow. The vent should be at least 3 feet away from any windows or doors to prevent moisture from re-entering the home. Install the vent at a slight upward slope to ensure proper drainage and airflow. Use a vent hood or louvered vent cover to protect against weather and pests. Regularly inspect and clean the venting system to remove lint and debris, which can cause blockages. Follow local building codes and manufacturer recommendations for venting materials and installation. Proper venting ensures optimal performance, reduces moisture-related issues, and helps prevent mold and mildew growth.
2.4 Child Safety Tips
To ensure a safe environment for children while using the GE Front Load Washer, keep them at a safe distance during operation. Never allow children to play with the washer or climb on it, as this can lead to accidents. Always supervise children when they are near the washer. Teach children not to insert hands or objects into the washer drum or controls. Ensure the lid is securely closed when not in use to prevent accidental access. Use the child safety lock feature, if available, to disable controls and prevent unintended operation. Store detergent and cleaning supplies out of reach of children. Regularly inspect the washer area for any potential hazards. By following these guidelines, you can help create a safer environment for children while maintaining the efficiency and performance of your washer.
Installation Requirements
Ensure the washer is placed on a firm, level surface. Check drain hose connections for proper setup and ensure venting is adequate. Verify electrical requirements are met.
3.1 Pre-Installation Checklist
Before installing your GE Front Load Washer, ensure the following steps are completed:
- Verify the model number matches the user manual specifications.
- Check the floor is level and sturdy to support the washer’s weight.
- Ensure electrical connections meet the washer’s voltage and power requirements.
- Confirm the drain hose is properly connected and venting is adequate.
- Inspect the area for any blockages or obstructions.
- Ensure the washer is placed on a stable surface to prevent vibration.
These steps ensure a safe and efficient installation process. Always refer to the manual for specific instructions.
3.2 Leveling and Balancing the Washer
To ensure optimal performance and minimize vibration during operation, proper leveling and balancing of your GE Front Load Washer are crucial. Start by placing the washer on a sturdy, even floor that can support its weight. Use a spirit level to check the balance by placing it on top of the washer. If the bubble is not centered, adjust the legs accordingly.
- Rock the washer gently to identify any wobbling.
- Adjust the legs by screwing them in or out to level the washer.
- Use the spirit level to confirm the washer is perfectly horizontal.
- Ensure all four legs are firmly touching the floor without over-tightening.
After leveling, run a short cycle to test for smooth operation. If vibrations persist, recheck the balance and consider using anti-vibration pads for added stability.
3.3 Drain Hose Setup and Configuration

Proper setup of the drain hose is essential for efficient operation and to prevent water damage. Attach the drain hose to the washer’s drain pump outlet, ensuring it is securely connected using the provided clips. Avoid kinking or bending the hose, as this can restrict water flow.
- Place the drain hose into a standpipe or laundry sink, ensuring it is at least 30 inches above the floor to allow proper drainage.
- Do not submerge the hose in water or allow it to dangle, as this can cause siphoning or backflow.
- Use the adjustable drain hose clip to secure the hose to the washer for stability.
- After installation, run a test cycle to check for leaks or improper drainage.
Always follow the manufacturer’s guidelines for drain hose configuration to ensure optimal performance and prevent potential issues.
3.4 Electrical Requirements and Connections
The GE Front Load Washer requires a dedicated 120V, 60Hz, 15- or 20-amp electrical circuit. Ensure the washer is connected to a grounded outlet to meet safety standards. Avoid sharing the circuit with other high-power appliances to prevent overload.

- Use a UL-listed power cord designed for heavy-duty appliances.
- Install a GFCI-protected outlet for enhanced safety, especially in laundry areas.
- Verify local electrical codes and regulations before installation.
- Consult a licensed electrician if unsure about connections or requirements.
Proper electrical setup ensures safe and efficient operation of the washer. Always refer to the user manual for specific electrical connection details.
Operating the Washer
Operating the GE Front Load Washer involves selecting cycles, customizing settings, and starting the wash. Use the control panel to navigate options, choose fabric type, and adjust temperature for optimal results.
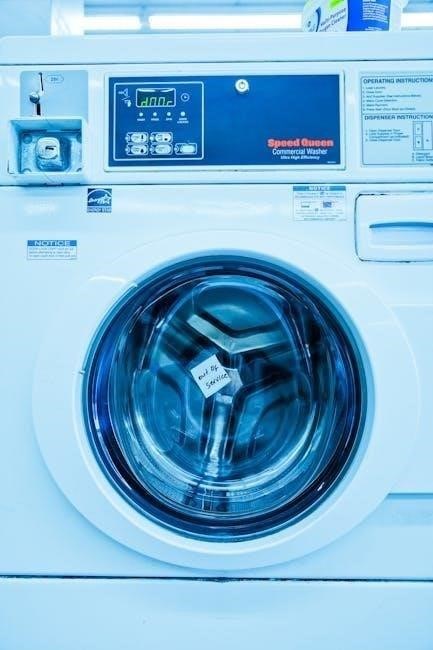
4.1 Control Panel Overview
The control panel of the GE Front Load Washer is designed for intuitive operation, offering a user-friendly interface to manage wash cycles and settings. Located on the front of the washer, it features a sleek design with easy-to-read buttons and a digital display. The panel allows you to select from various pre-programmed wash cycles, including options for delicate fabrics, heavy-duty cleaning, and steam wash. Additionally, you can customize settings such as water temperature, spin speed, and soil level to accommodate different types of laundry; The display screen provides real-time updates on the wash cycle progress, ensuring you stay informed throughout the process. The control panel also includes buttons for activating special features like sanitize and steam cleaning. With its logical layout and clear labeling, the control panel makes it easy to navigate and adjust settings for optimal washing results. Its design ensures seamless interaction, catering to both routine and specialized laundry needs.
4.2 Selecting Wash Cycles and Options
Selecting the right wash cycle and options on your GE Front Load Washer is essential for achieving optimal cleaning results. The washer offers a variety of pre-programmed cycles, including Normal, Heavy Duty, Delicate, and Quick Wash, each designed for specific fabric types and soil levels. To select a cycle, use the cycle selector button on the control panel and choose the option that best matches your load. Additional customization options include adjusting the soil level, load size, and water temperature. For tougher stains, enable the Steam Clean or Sanitize feature. The washer also allows you to add a pre-wash or deep rinse for enhanced cleaning. Options can be selected using the respective buttons on the control panel. Refer to the control panel overview for more details on navigating these settings. By tailoring the cycle and options to your laundry needs, you ensure a thorough and gentle cleaning process.
4.3 Customizing Wash Settings
Customizing wash settings on your GE Front Load Washer allows you to tailor the cleaning process to your specific needs. Use the control panel to adjust settings such as soil level, water temperature, and spin speed. For heavily soiled items, select the “Heavy Duty” or “Deep Clean” option. If you prefer a gentler wash, choose the “Delicate” or “Hand Wash” cycle. Additionally, you can enable features like Steam Clean for tougher stains or Sanitize to eliminate bacteria. The washer also offers options for pre-wash and extended rinse for added convenience. To customize, navigate through the options using the buttons on the control panel and select your preferred settings before starting the cycle. This level of customization ensures your laundry is cleaned thoroughly while protecting fabrics. Always refer to the control panel overview for detailed guidance on adjusting these settings.
4.4 Starting the Wash Cycle

To start the wash cycle on your GE Front Load Washer, ensure it is properly installed and connected to water and electricity. Load your clothes, making sure not to overload the washer. Add the recommended detergent, suitable for a front-loading machine. Select the appropriate wash cycle based on the type of clothes. Adjust settings like soil level and temperature as needed. Close the door securely, ensuring it is locked to begin the cycle. Press the Start button. If needed, you can pause or cancel the cycle by pressing and holding the Start button. After the cycle completes, remove clothes promptly to prevent odors. For safety, consider using the child safety lock to prevent accidental changes. Always refer to the user manual for detailed instructions and troubleshooting tips.
Maintenance and Care
Regular maintenance ensures optimal performance. Clean the gasket and seals to prevent mold. Check and clean the drain pump filter to avoid blockages. Regular cleaning prevents odors and maintains efficiency.

5.1 Cleaning the Gasket and Seals
Cleaning the gasket and seals is essential to maintain hygiene and prevent mold growth. Open the washer door and inspect the gasket for visible debris or mildew.
Use a soft brush or cloth to gently scrub away any buildup. Mix a solution of equal parts water and white vinegar, and apply it to the gasket. Let it sit for 10-15 minutes to loosen stubborn residue.
Rinse thoroughly with clean water and dry the area with a towel. Regular cleaning prevents odors and ensures the door seals properly, maintaining the washer’s performance and longevity.
For tougher stains, a mild detergent can be used, but avoid harsh chemicals that might damage the rubber. Always dry the gasket after cleaning to prevent moisture buildup.
Check the drain pump filter during this process to ensure it’s free of blockages, as clogs can contribute to mold and odor issues. Cleaning the gasket and seals regularly is a simple step to keep your washer in top condition.
5.2 Checking and Cleaning the Drain Pump Filter
To maintain optimal performance, regularly inspect and clean the drain pump filter. Locate the filter, typically found at the bottom of the washer, often behind a panel or access cover.
Open the access panel and carefully remove the filter. Use a soft brush or cloth to wipe away debris, and rinse it under warm water until clean. For stubborn buildup, soak the filter in a mild detergent solution.
Reinstall the filter securely to ensure proper drainage. Check for blockages in the drain hose and pump area to prevent water flow issues. Cleaning the filter regularly helps prevent odors and ensures efficient operation.
After cleaning, run a short wash cycle to test functionality. This maintenance step is crucial for prolonging the washer’s lifespan and maintaining its performance. Always refer to your user manual for specific instructions tailored to your model.
Regular cleaning of the drain pump filter is a simple yet effective way to keep your GE Front Load Washer running smoothly and efficiently. It also helps in preventing common issues like clogs and odors.
5.3 Regular Cleaning Tips for Optimal Performance
Regular cleaning is essential to maintain your GE Front Load Washer’s performance and prevent odor buildup. After each use, leave the washer door open to allow the interior to dry completely, reducing moisture that can lead to mold and mildew.
Clean the gasket and seals around the door regularly by wiping them down with a mild detergent and warm water. This helps remove detergent residue and debris that can accumulate. Additionally, run a cleaning cycle or a hot water wash with a washer cleaner every 1-2 months to sanitize the interior.
Check and clean the detergent dispenser periodically to ensure proper flow and prevent clogs. For tough odors, add a cup of white vinegar to the wash cycle. Regular cleaning not only enhances performance but also extends the lifespan of your washer and keeps your laundry fresh and clean.
5.4 Checking for Blockages in the Drain Hose
Regularly inspecting the drain hose for blockages is crucial to ensure proper water drainage and prevent issues like poor washing performance or odors. Start by locating the drain hose at the back of the washer, typically connected to a drain pipe or standpipe.
Check for visible kinks or twists in the hose that could restrict water flow. If you suspect a blockage, detach the hose from the washer and drain pipe, then flush it with warm water to remove any debris or buildup.
For tough blockages, use a soft brush or plumbing snake to clear the obstruction. After cleaning, reconnect the hose securely to avoid leaks. If issues persist, consider running a cleaning cycle with a washer cleaner to remove internal debris. Regular maintenance helps ensure efficient operation and prevents future problems. Always refer to your user manual for specific instructions tailored to your model.
Troubleshooting Common Issues
Identify and resolve common issues like error codes, unusual noises, or odor problems by referencing the user manual. Regular maintenance and proper usage can prevent many of these issues.
6.1 Understanding Error Codes
GE Front Load Washers use error codes to indicate specific issues, helping users diagnose problems quickly. These codes, such as “E1,” “E2,” or “E3,” are displayed on the control panel.
- E1: Often indicates a drain pump issue or clogged drain hose.
- E2: May signal a communication error between internal components.
- E3: Could point to a software or sensor malfunction.
Refer to the user manual for detailed explanations of each code. Addressing the issue promptly ensures optimal performance and prevents further damage. If unresolved, contact GE customer support for assistance.
Regular maintenance, such as cleaning filters and checking connections, can help avoid common errors. Always follow troubleshooting steps before seeking professional help.
6.2 Diagnosing Unusual Noises
Unusual noises during operation can indicate specific issues with your GE Front Load Washer. Common sounds like clunking, rattling, or grinding often point to loose items, misbalanced loads, or internal component malfunctions.
- Clunking or Rattling: Check for loose objects like coins or zippers in the drum. Ensure the washer is properly leveled and balanced.
- Grinding or Screeching: This may indicate worn-out bearings or a malfunctioning drain pump. Inspect the drain pump filter for blockages.
- Vibrating Noises: Imbalanced loads or uneven installation can cause vibrations. Redistribute laundry evenly and adjust the legs if necessary.
Addressing these issues promptly can prevent further damage. If noises persist, consult the user manual or contact GE customer support for professional assistance. Regular maintenance, like cleaning filters and checking connections, helps minimize noise-related problems.
6.3 Addressing Odor Issues
Odor issues in your GE Front Load Washer can often be resolved with regular maintenance. GE’s UltraFresh Vent System with OdorBlock technology helps prevent bacterial growth that causes bad smells. Run a cleaning cycle with a washer cleaner or vinegar to sanitize the interior.
- Leave the washer door open after use to allow the drum to dry completely.
- Clean the gasket and drain pump filter regularly to remove debris and mildew.
- Check for blockages in the drain hose, as poor drainage can lead to odors.
- For persistent smells, run a hot water cycle with a washing machine cleaner or 1 cup of white vinegar.
Prevent future odors by ensuring proper ventilation and avoiding excessive detergent use. Regular maintenance will keep your washer fresh and clean.
Warranty and Support
GE offers a limited warranty covering parts and labor for defective materials. Register your washer online for warranty validation. Contact customer support at 1-800-626-2005 for assistance and repairs.
7.1 Limited Warranty Overview
GE Appliances provides a limited warranty for the Front Load Washer, covering defective materials and workmanship. The warranty is valid for the original purchaser and is non-transferable. It typically lasts for one year from the date of purchase, with certain parts like the tub and basket covered for 10 years. The warranty does not apply to damage caused by misuse, neglect, or normal wear and tear. To ensure coverage, register your washer on the GE Appliances website or through their customer support. For detailed terms and conditions, refer to the warranty section in your user manual or visit the GE Appliances official website. Proper maintenance and adherence to guidelines can help extend the lifespan of your washer and maintain warranty validity.
7.2 Contacting Customer Support
For assistance with your GE Front Load Washer, contact customer support by calling 1-800-626-2005. Representatives are available to help with troubleshooting, repairs, and warranty inquiries. You can also visit the official GE Appliances website at geappliances.com for live chat support, FAQs, and downloadable resources. To ensure efficient service, have your washer’s model number and serial number ready when reaching out. The website also provides a comprehensive support section where you can find user manuals, repair guides, and maintenance tips. Additionally, GE Appliances offers online chat support for quick answers to common questions. For scheduling service appointments or parts replacements, the customer support team is equipped to guide you through the process. Their support services are designed to help you maintain your washer’s performance and address any concerns promptly.